
The Global Lab WEB Process:
The web support for Global Lab will vary by year and sponsor.
For 2008-9 students
and teachers in the current GL can work on-line at
thanks to the support of Intel in Russia.
1.
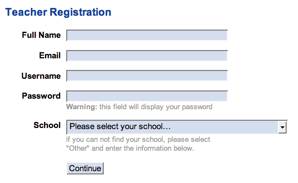
Registration: Click on the
registration button in the left menu. Then Select "Teacher".
In
your registration, you select your own username and your school, if it is
already entered. If your school
has not been entered already, you will need to select "Other" and
provide more information.
After
you press Continue, or provide
more information about your school, you will
be told that your registration is complete:
2.
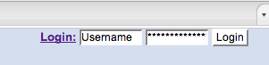
Log-In and Class Creation: Now you
can log in directly in the space at the top right of the page:
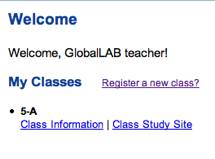
After logging in, you'll see a page that shows all of
your classes.
If you are a new teacher, there will not be classes
listed yet. It will say:
Register a new class?
You
click on the Register a new class link to get to the next screen.
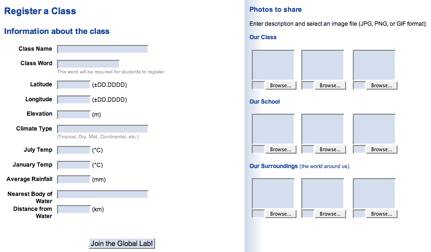
When
you create your class you will be asked to create a special class password;
This word is used by the students when they create their account. It puts
them in the class that you created. After that, students will sign-in at
the top just as you do. (What they see on their pages is different than
what the you see because the system knows they are students.)
The
demographic information is self-evident, but does not have to all be filled in
upon registration. It can be
entered over the first month.
Pictures, too, can be a class project. Clicking the Browse button will allow you to search for and upload images. (See Working with Picture, below.)
Once
your school enters information in the registration process, a star appears as
on a map. One can pull this map around so that it centers over your school.

Clicking
on the star brings up the school name and links to its data.
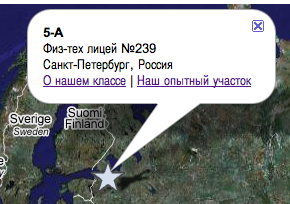
From
links in the call out (the area in quotes), we can find out more about a
school's participating class, school and study site. (Clicking on the X will close the call-out.)
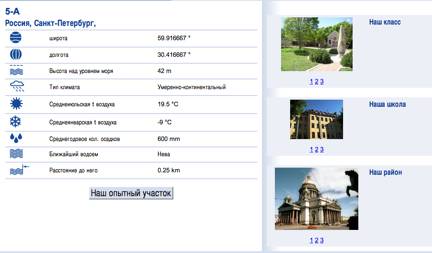
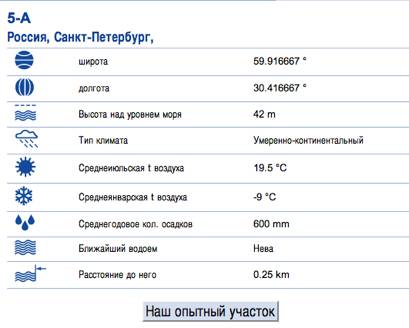
From
the first class link you will be able to see the demographic information:
2.
Your students, too, will also have to register once in order to enter their choice of
username and password. They are
asked to write these in their journal.
It may be useful for you to keep a complete print out of their usernames
and passwords in your desk! That list is available as one of the four links you
see under the name of your class: Edit, View Class List, Study Site, Class
Info.
3.
Working with Pictures From the second
link you can see pictures of a class, school and study site in a photographic
array.
From
the study site link:
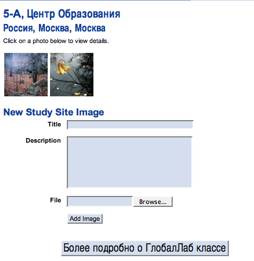
Each
new picture needs a title (less than 255 characters) and one or two sentence
description. Ideally the pictures are 640
by 480 pixels or higher, but not much
more than 2 MB each.
Each
picture can be annotated for sharing with students in other classes. (The only
annotations possible currently are boxes drawn on top of the image. Each
of these can have a title and some information about it.) As the project
continues, more information will be linked to your basic web page for sharing
with others.