Terrariums as Models: A Moss Ecosystem
Developed by Dr. Shirley Griffin, teacher of Ecology, Ashburnham, MA
For Global Lab
Terrariums can help us understand what would happen to our piece of land if any of our key variables changed significantly.
How much change would be too much change?
Which changes would have the most effect on the life in our area?
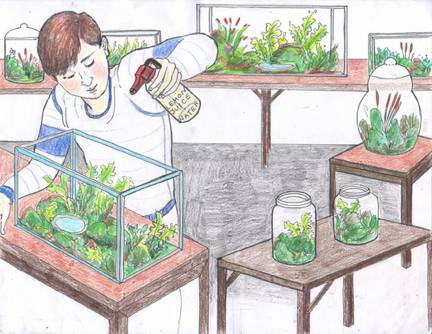
1. Preparation: Collect materials
for terrarium
Materials:
white pan collecting tray
trowel or digging tool
damp paper towel
small aquariums
or
gallon glass jug with wood stand / or 2-3 plastic gallon jug with top removed. Large mayonnaise jars schools use are fine. Lay on side and use wooden molding on either side to hold in place.
identification book
plastic spoons
charcoal
gravel
Activity Steps:
List the factors that seem important to the study site (such as sun, water, climate, dominant vegetation, light, soil moisture and type, temperature
Introduce the idea of physical models.
Begin to quantify factors. Which factors are most important to moss. Which might limit growth by its absence? Consider what the moss systems range of tolerance might be for the various factors. How much light can the habitat floor (moss, whatever) tolerate? How little light cold it tolerate?
The closer the resemblance to the actual piece of land you are investigating, the better the inference.
Have teams of 3 build a habitat floor bottle terrarium: include rocks and pebbles, potting soil and vegetation.
2. Preparing the Terrarium
Spread newspapers on the lab tables
Get a gallon jug; be sure it is clean and dry.
Put a one-inch layer of charcoal and aquarium stones in the container. Spread it out evenly. Consider what these represent (parent rock.)
Cover this layer with a 2-inch layer of soil from your study site. You might mix in some potting soil.
Smooth the soil evenly but do not pack it down. Consider why? (soil pores critical for root growth; organisms living in soil make room for air, animal movement)
Collect enough small plants to fill the container . Do not make it too crowded.
(If you have a forest habitat, species of mosses and small ferns make a good base. Plants with berries may be used. Dig around the roots of flowers. Important note: Since mosses and ferns do not have true roots, take the soil with them to be sure they will grow.)
Look for interesting rocks, seeds to add to your habitat.
Do not put in any small beasties. We have no way to feed them.
Put your samples in a pan. Bring them to class, add a moist paper towel, and cover with plastic wrap. We will plant them tomorrow.
3. Planting the Terrarium
Arrange your plants in the container. Plant the flowers. Push moss and ferns into the soil with your hands.
Add the rocks, sticks, lichen and seeds.
Put a clear plastic wrap tightly across the opening of the container. A rubber band or tape will hold it in place.
Put your terrarium in a place where there is light, but no direct sun.
Explain that it will take a few days to see if the life in the terrarium will survive. They will be doing experiments on the model. Ask students what sense they could make of the findings if the plants might have died in any case of root damage.
4. Caring for the Terrarium
Check for water; if there are water drops on the plastic wrap, your terrarium is fine. If not, sprinkle (do not pour) with water.
Watch for appearance of mold
Extensions: Other terrariums: You may want to make a few extra bottles for experimenting with factors not previously identified (e.g. covering the top with different layers of thick paper to represent clouds, or breathing in CO2).
See Building a Rainmaker
5. Experimenting with the Terrariums
Materials
baking soda
lemon juice
hair dryer
adjustable light map
Activity Steps
1. Retrieve terrariums and see if they are viable (plants are alive; no mold)
2. If some terrariums are not viable, have those students join other teams.
3. Set up journals for Lab Observations.
4. Predict what will happen after some experimental manipulation.
5. Take initial measurements.
6. Do the experimental manipulation, increasing the test of the range of tolerance; increasing the stress.
(It is important for the class to work out what they want to test. For example, Shirley Griffin's class, with a moss habitat, determined that moss had a pH around 5, and decided to stress the moss.)
pH team
with lemon juice (pH3),
baking soda (pH8
Temperature team
heat (a blow drier) and
freezing (in a freezer for 24 hours)
Water team
too much water
too little water
Light team
in dark with 0 foot candles.
In light above 950 FC
This is an opportunity to
discuss adaptation.
6. Share your results with other GL teams.