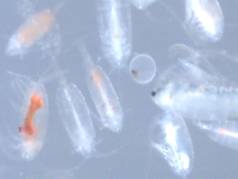
Microorganism Team - Water Biodiversity Field WorkGlobal Lab
Contributed by William McWeeny, former GL teacher |
Assembling a Plankton NetPrepare the plankton net before you go to your study site. Materials
|
Procedures1 In small groups, pick out an edge of the water where you can reach an arm’s length without falling in. In particular, look for areas with scum on the surface or other places where microorganisms might live. 2 Put on protective gloves and goggles.
4 Take another small jar with the lid on, and label it “bottom sample.” Hold the jar closed under the water near the bottom. Open the top so that the bottom material (dirt, decaying leaves, etc.) and bottom water flows into the jar. Put the open jar into the holding bucket for later use. (You can substitute a kitchen baster or syringe with rubber tubing to suck up a bottom sample.) 5 Collect small rocks, twigs, and leaves from the bottom of the water. It is good if they feel slippery, because this indicates some type of growth. Store these samples in a labeled plastic bag with a little bit of water and put them in your storage bucket. Do not let them dry out. 6 One student should hold the plankton net over the edge of the body of water at arm’s length. Another team member should tie a string onto a 1-gallon bucket and scoop water up so that bottom material is not disturbed. Pour the bucket of water slowly through the plankton net. Repeat this 10 times. Empty the plankton net sample into a labeled jar and put the open jar into your storage bucket. There should be a lot of debris and only a little water—you want to have as thick a soup as possible. Clean the net with a reverse rinsing. 7 Record in your journals and on the class map the exact location from which the sample was taken. Use the meter stick to help you estimate the depth of your sample, and record all relevant information in your journal or on a Data Sheet. 8 Bring the samples and equipment back to the lab. Observe the organisms as soon as possible, no later than 24 hours after the sample is collected. Keep lids open and the water exposed to air. If possible, aerate the sample using a small air pump. |
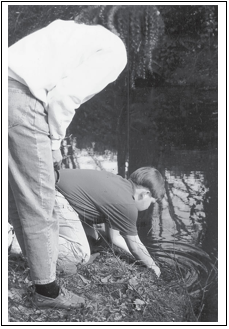 3 Carefully skim some surface scum into a small jar. Try to get as much scum as possible and as little water as for each possible. Label the jar "surface sample" and store it upright, without a group cover, in a bucket for later use.